

5th-8th Assignment #5
- May 5, 2020
- 2 min read
First... I want to say you guys are hilarious! I absolutely love all the artwork that has been emailed to me. It has been wonderful to see your personality coming through in your work. You all continue to be pretty awesome!
This weeks assignment is going to be a silhouette made out of rolled up pieces of paper. Rolling the paper will take time, so please keep in mind that you might not be able to finish this project in one day. If you choose to continue working on it for next week then send me an email letting me know.


Materials:
-Paper (any scraps of paper or magazines will work)
-Hard backing (piece of cardboard, scrap of plywood, etc)
-Glue (both glue stick and a hot glue gun would work but if you only have a glue stick then that will be fine)
-Pencil
-Scissors
Additional Materials:
-Markers
-Watercolors
-Spray Bottle
-Paintbrush
1. You will need to decide if you would like to color your paper first if you have plain white paper. If you are using colored paper or magazines then you can move onto Step 2.
Techniques to try:
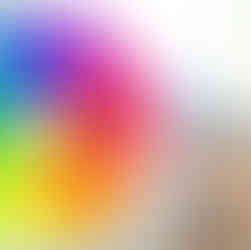
- Watercolors: Use the wet on wet method to paint your paper. First begin by adding water to your paper with a paintbrush or spray bottle (be careful not to add too much water because the paper might rip). Next, add watercolor and gently apply the paint - let the water do the work for you with mixing and swirling to get gorgeous textures.


- Marker Melt: Another technique you could try would be the Marker Melt. First scribble on your paper with your markers (make sure they are the washable kind) and then spray with water or apply water with a paintbrush.


2. Time to decide on what you would like to create for your silhouette. It can be anything (sunglasses, flower, logo, animal, etc). Lightly sketch out the silhouette of your object on a piece of hard material such as cardboard or plywood.
3. Once your paper is dry, you can start rolling up the paper into tube shapes. It can sometimes help to find a cylinder to roll the paper around such as a pencil. Be sure to add glue to the back of the paper so that it sticks and doesn't come undone.
3. After you have several tubes rolled up, you are going to place them into the silhouette and mark where you will need to cut the tube in order for it to fit within the design.
4. Cut and glue the tubes inside of your silhouette. A hot glue gun would work better for this part of the project but please make sure you have adult supervision.
5. Continue to add the tubes to your silhouette until complete.
6. Take a picture and send it to me!


Comments